












Quindici minuti sopra l'acqua aperta, in una stanza di vetro, sopra un arcipelago — la Funivia di Hon Thom è un'unica lunga opportunità fotografica con isole occasionali al suo interno. Ma il mare è luminoso, il vetro è reale e gli scatti migliori si muovono. Abbiamo fotografato la linea in entrambe le sessioni e in ogni stagione, e questa guida raccoglie le composizioni, le impostazioni che sopravvivono al riflesso e al movimento, e i momenti per cui vale la pena impostare l'orologio.
Punti chiave
- Luce migliore: sessione mattutina per il mare piatto e limpido; il ritorno dalle 16:00 alle 16:45 per la luce dorata e l'avvicinamento alla “città romana”.
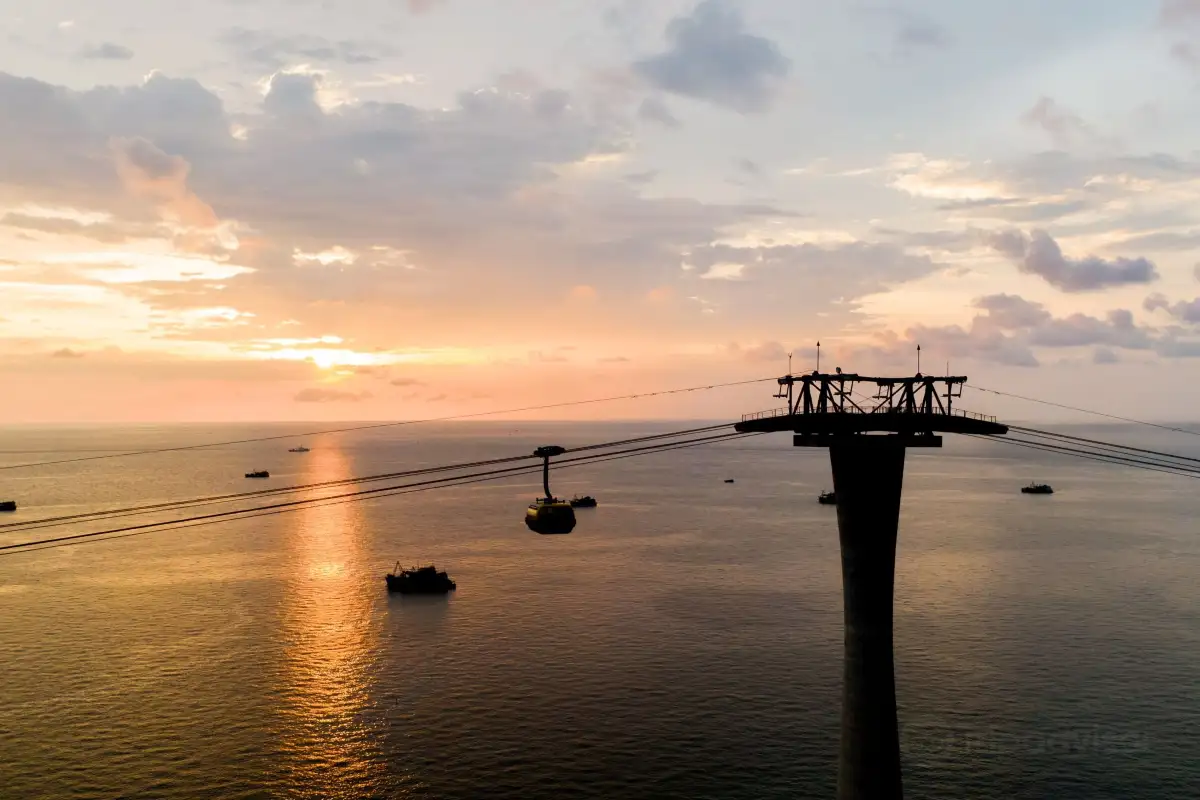
- Cinque scatti iconici: lo scatto dall'alto su un'isolotto, la cabina che passa, la torre che emerge dal mare, la laguna d'arrivo e il ritorno in silhouette.
- Gestione del vetro: obiettivo vicino alla finestra, paraluce montato, scattare in diagonale attraverso i grandi pannelli di vetro — i riflessi scompaiono a distanza ravvicinata.
- Bonus parco acquatico: Aquatopia si fotografa bene dall'alto durante l'avvicinamento — un fotogramma simile a una mappa che nessun visitatore da terra ottiene.
- Chi fotografa con lo smartphone può stare tranquillo: le cabine sono stabili; uno smartphone con obiettivo 2× copre quasi ogni fotogramma di questa guida.
Risposta rapida: prenota la sessione pomeridiana su Trip.com, prendi i posti anteriori al ritorno e otterrai cinque dei cinque scatti iconici in una sola corsa. La mattina è per il colore dell'acqua; il tardo pomeriggio è per tutto il resto.
I cinque scatti iconici
Ogni memorabile foto della Funivia di Hon Thom è uno di questi cinque scatti. Imparali e l'intera corsa diventa una checklist che puoi goderti.
- Lo scatto dall'alto su un isolotto — quando una piccola isola passa direttamente sotto la linea, scatta verso il basso attraverso il vetro: giungla, sabbia chiara e l'anello turchese dei bassi fondali. È il fotogramma che dice “funivia sul mare” in una sola immagine.
- La cabina che passa — a metà traversata, la cabina in direzione opposta scivola a pochi metri di distanza. Grandangolo, entrambe le cabine e il mare tra di esse: il classico scatto delle due cabine sopra l'oceano.
- La torre in mare — le torri di supporto emergono direttamente dall'acqua. Fotografale all'altezza della cabina, con una o due cabine di passaggio per dare scala, e l'ingegneria racconta la sua storia.
- La laguna d'arrivo — negli ultimi minuti prima della stazione di Hon Thom, la laguna si apre sotto e l'ombra della cabina scorre sull'acqua. Guarda in basso e indietro per l'angolazione migliore.
- Il ritorno in silhouette — nella corsa di ritorno nel tardo pomeriggio, torri e cabine diventano nere contro il mare dorato. Silhouette, non dettaglio — esponi per l'acqua.
Fotografare attraverso il vetro della cabina
Le cabine hanno grandi finestre di vetro, che è il punto centrale — e il principale ostacolo tecnico. Tre abitudini risolvono il novanta percento del problema: premi l'obiettivo vicino al pannello (i riflessi vivono nello spazio tra i due), scatta in leggera diagonale rather than dead-on where your reflection sits, e usa un paraluce o una mano a coppa per ombreggiare l'elemento frontale. Non appoggiarti mai al vetro — le cabine si muovono delicatamente e le tue foto lo percepiranno.
Da sapere: i posti anteriori nella corsa di ritorno sono i posti dei fotografi — i recensori lo dicono esplicitamente: al ritorno verso Sunset Town, prendi la parte anteriore così che la collina della ’città romana“ scivoli nel fotogramma. Non ci sono posti assegnati; sali velocemente e cammina verso il lato rivolto in avanti.
Impostazioni che sopravvivono a riflessi e movimento
La luce sul mare è brutale e il soggetto non si ferma mai. Le impostazioni seguenti sono punti di partenza, non dogmi:
- Prima il tempo di scatto. 1/1000 s o più veloce per gli scatti dall'alto e la cabina che passa; il mare si muove anche quando la cabina sembra ferma.
- Esponi per l'acqua. Il mare è la cosa più luminosa in ogni fotogramma; lascia che le isole e le torri diventino un po' più scure piuttosto che bruciare l'acqua al bianco.
- Polarizzatore, con attenzione. Un CPL taglia i riflessi attraverso il vetro e intensifica il colore dell'acqua — ma può anche creare chiazze scure irregolari contro il vetro della cabina. Ruotalo guardando attraverso il mirino e fermati dove il fotogramma è uniforme.
- Modalità raffica per il passaggio. La cabina opposta sparisce in pochi secondi; scatta una breve raffica e scegli il fotogramma in cui le due cabine sono allineate.
- Smartphone: obiettivo 2× se ce l'hai, tocca-esponi leggermente verso il basso sull'acqua e blocca la messa a fuoco prima che l'isolotto passi sotto di te.
Il ritorno durante la golden hour, minuto per minuto
The afternoon return is the shoot the day builds toward. A rough timeline for the ride back to An Thới:
- T–15 min. Leaving Hon Thom: shoot back at the island — the coast recedes and the towers line up into the distance.
- T–10. Mid-sea: the water turns to hammered gold; this is silhouette country for the towers and the passing cabin.
- T–5. The first islets reappear below — one last down-shot, now in warm light.
- T–2. Sunset Town and the “Roman town” climb the hillside ahead; front seats earn their keep right here.
- T–0. Into An Thới station — switch to the seafront and the Kiss Bridge if your bundle includes it: the bridge at dusk is the natural final frame.
Aquatopia e scatti a livello del suolo
The photography does not start and end in the cabin. On the approach to Hon Thom, Aquatopia spreads out directly beneath the line — slides, pools and the fast-flowing river in a graphic, map-like composition that no one on the ground can get. Down on the island, the park shoots best in the midday session gap: the slides against blue sky from the bottom, the river from the bridge, and the universal favorite — the moment someone hits the drop slide. Water protection matters more than megapixels down here; a cheap pouch beats a fancy lens you dare not raise.
And back on the Phú Quốc side after the ride: Sunset Town’s Mediterranean lanes and the hillside “Roman town” give you the street-level counterpoint to your aerial frames — the same skyline, fifteen minutes apart, from two completely different altitudes.
Frequently asked questions
Which session is better for photography?
Morning for the sea color — the water layers read clearest in flat morning light. Late afternoon for everything else: golden tones, the silhouette return and the Sunset Town approach. If you shoot once, ride the afternoon return around 4:00–4:45 PM.
Can I use a drone?
The cable line crosses open sea at height, near a busy attraction and a developing town area — this is exactly the kind of place to check and respect local drone rules on site rather than assume. The honest answer: the best aerials here are the ones the cable car itself provides.
How do I avoid reflections in the cabin glass?
Lens close to the pane, slight angle, hood or cupped hand as a shade. Reflections live in the air gap between lens and glass; remove the gap and they mostly disappear.
Is there time to set up shots?
Fifteen minutes each way is generous — enough for all five signature frames at a relaxed pace. The only moment that demands speed is the passing cabin: keep the camera unlocked and in burst mode through the middle of the crossing.
What about shooting the water park?
From the air on the approach (the map shot) and at ground level in the session gap. Bring a waterproof pouch — the lazy river and the wave pools are the two best ground-level scenes, and both involve getting splashed.
Book the light, then bring the battery
Five signature frames in one return ride
Instant confirmation, any international card, e-ticket boarding — the afternoon session ends in the best light of the day.
Build the shoot into the trip: time it with the best-time guide, price it with the tickets guide, and slot it into a full day with the itineraries guide. The Guida per i visitatori has the practical details.
Sources & official references
- Trip.com — Hon Thom Cable Car – Sun World Hon Thom attraction listing (checked October 2026): large glass-window cabins, 360-degree aerial views, one-way journey about fifteen minutes.
- Verified traveler reviews on Trip.com (24,709 reviews, 4.5/5 average) for the front-seat return tip, the “Roman town” view and the private-cabin photo story.
- Compositions and settings tested by our editorial team across both sessions on 2025–2026 visits.
